In this Alone in the Dark Chapter 4 puzzle guide, we’ll be looking at all the major events that lead to the game’s ending. Based on the character you’ve picked, the endings will be the same even though the cutscenes have been different for each. However, the endings may be a little different if you’ve collected certain sets of Lagniappes.
From exploring the French Quarters (again) to making your way to the Arctic, there are quite a few puzzles that will test your patience if you’re not careful. Let’s go about finding the best possible way to explore these.
Alone in the Dark Chapter 4 puzzle guide and walkthrough – the drawings, Ruth’s camera puzzles, and revising certain areas
You’ll be starting off out the attic, and making your way to the Steamboat. First, find your way to the Sitting Room where you’ll be triggering a cutscene with MacCarfey. This is when you’ll find a Vestibule 1st-floor key. Next, solve a safe-cracking puzzle by ripping out the wallpaper and matching numbers to Edwards’s detective ID. This is L6 R9 L2. Make sure you pick up the coin. Find MacCarfey’s Room and unlock it with the coin.
Get a drawing, and find a key to Gray’s Office door. You can do this through the safe in Administration & Records. The code is L9 R1 L3. After this, head to Grace’s Room and add the drawings, solving the puzzle. Next comes French Quarters 3.
This is an important part of Alone in the Dark since it deals with Edward’s trauma. Upon entering his office, you’ll pick up the desk key and clues. Add them to the clue board on the wall. Interact with the ghosts on the way next, and find yourself heading through the tram, entering the park.
As you make your way through this area of Alone in the Dark, there are specific objects that feel a little out of place. For instance, you’ll find a crashed car that has a ghost in it. Move towards St. George Hotel and meet Edward’s ghost. Climb up a flight of stairs pick up three clues in the room, and put them on the map.
Next comes the Pearl River Bridge, this aspect of the chapter will lead you to a cutscene with Grace. Once you’re making your way around the shed, you’ll have to hit the vines growing on the bridge’s railings. Do this three times.
This unlocks the way towards an area marked by yellow paint. After this, you can enter the Sitting Room again, similar to before, and open the safe with the code L9 R1 L8 to pick up the flash bulb.
Exploring Emily’s trauma, the Medical Ward, and the final chapter
This section of Alone in the Dark highlights Emily’s story, and has you explore an action sequence involving the Moundbeast. Upon doing so, you’ll eventually arrive at a tunnel.
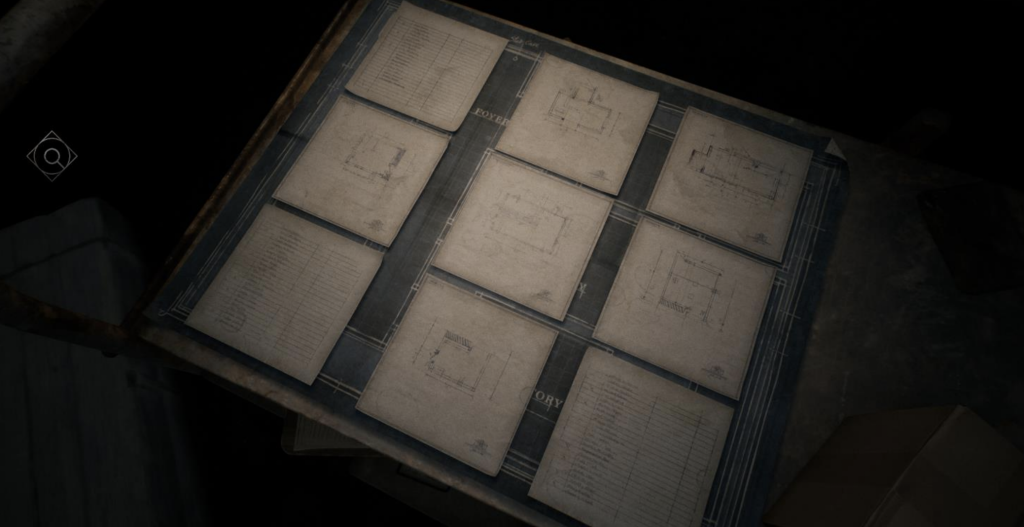
Here, find a radio and adjust its frequency to call in an airstrike. The game reveals the Moundbeast to be buried in a collapsing stunned, leading to a scene where you can interact with a frozen explosion. Return from the Warphoto, and find yourself in the Medical Ward – the Morgue. You’ll find a crowbar here that opens a box containing blueprints. Put this in order (refer to the image above), and you’ll obtain a key to the Morgue. Feel free to explore the rest of this area of Alone in the Dark.
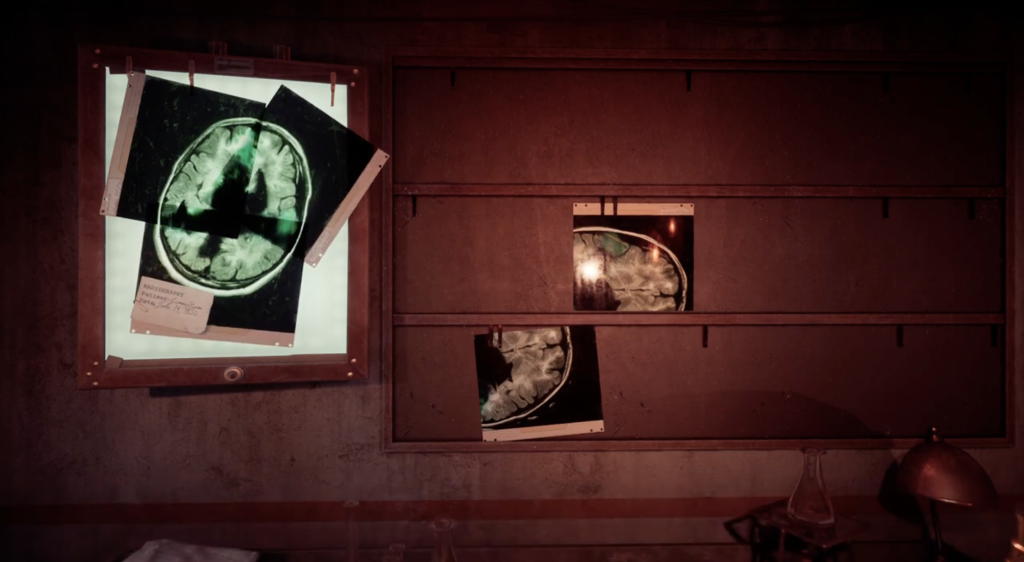
Next, enter the Quarantine and pick up the fuse. There’s another on the wall in Surgery, leading to a short X-Raay puzzle, which will give you a statuette piece. Progress your way through the attic next, and use the talisman (code 9-3-1).
Moving forward, fighting through a bunch of enemies pick up some coal, and head to the furnace from the top deck. What follows is a sequence that takes you back to Derceto.
From Gray’s Apartment, remove the cloth from the mirror and find a key that can be used for the closet in the bedroom. Remember to add the talisman to the socket on the clock, setting it to the same position as noticed from the markings on the floor. After a small set of sequences, you will enter the Arctic.
If you thought the game has already been a scary ride, well, you’re in for something more. Amidst the blizzard, you’ll have to carefully look for points of interest in this part of Alone in the Dark. Ideally, you need to use a flare gun to locate flags in this blizzard. Use the Sacrificial dagger to your advantage! You also need to line up the talisman on the floor according to a pattern. This, combined with the outer disc in its right rotation will lead to the final fight with Jacob. Technically, this is Chapter 5 of Alone in the Dark.
The fight is a combination of quick puzzle-solving with subtle movement and gameplay mechanics. You need to avoid the boss’s strikes and keep firing at her ulcers. At the same time, keeps killing enemies that spawn next to her. Eventually, defeating her will lead to the final cutscene.
How was the final chapter for you in Alone in the Dark? What was the most difficult bit? Let us know in the comments below.